
Radon Fan Installation Guide: Types, Costs, Replacement, and Maintenance
Key Takeaways
- The radon fan is the heart of your mitigation system—without it, the system is just passive piping that may not reduce radon levels enough.
- Radon fans typically last 5–12 years depending on the model and operating conditions.
- Replacement costs range from $150–$600 for the fan itself, plus $200–$500 for professional installation labor.
- Warning signs of a failing fan include unusual noise, no reading on your manometer, and rising radon test results.
- Annual maintenance is minimal but important—check your manometer monthly and test radon levels at least every two years.
Your radon mitigation system is only as effective as the fan that powers it. The fan creates the negative pressure beneath your foundation that draws radon gas out of the soil and vents it safely above your roofline. When the fan stops working—or starts losing performance—your radon levels climb right back up.
This guide covers everything you need to know about radon fan installation, from choosing the right fan to recognizing when it is time for a replacement.
How a Radon Fan Works
A radon mitigation fan is an inline fan mounted in the PVC piping of your mitigation system. It operates continuously, 24 hours a day, 365 days a year. The fan creates suction (negative pressure) beneath your foundation slab, pulling radon-laden air from the soil and exhausting it above the roof where it disperses harmlessly into the atmosphere.
Unlike a bathroom exhaust fan or attic fan, radon fans are specifically engineered for continuous operation in harsh conditions. They must handle moisture, temperature extremes, and the corrosive nature of soil gases. This is not a place to use a general-purpose fan—always use a fan rated and listed for radon mitigation.
Types of Radon Fans
Radon fans come in several categories based on their performance characteristics. Choosing the right one depends on your home’s soil conditions, foundation type, and the radon levels you are dealing with.
Low-Suction, High-Airflow Fans
These fans move a large volume of air but at lower pressure. They work best in homes with highly permeable soil or thick gravel beds beneath the slab, where air flows easily. Typical specs are 100–200+ CFM at 0.5–1.0 inches of water column (WC) pressure. They also tend to run quieter and consume less electricity—often 20–40 watts.
High-Suction, Low-Airflow Fans
These fans generate more pressure to pull air through tighter, less permeable soils like dense clay. They move less total air volume but can create suction across a wider area of the sub-slab. Typical specs are 40–100 CFM at 1.5–3.0 inches WC. They draw more power—often 70–150 watts—and can be louder.
Mid-Range Fans
Most residential installations use a mid-range fan that balances airflow and suction. These are the workhorses of the industry and handle the widest variety of conditions. If you are not sure what you need, this is typically where a professional mitigator will start.
Common Fan Brands
The most widely used radon fan brands include RadonAway, Festa, and Fantech. All three manufacture models specifically designed and listed for radon mitigation. When shopping for a replacement, make sure the fan is specifically listed for radon use—this is not optional.
Where the Fan Gets Installed
Fan placement is critical for both safety and performance. The fan must be installed in a location where any leak from the fan housing would not introduce radon gas into your living space.
Acceptable Locations
- Attic. The most common location. The fan pulls air up through the pipe from below, and any leaks exhaust into the attic space, which is ventilated to the outside.
- Exterior of the house. Mounted on the outside wall with the pipe running up to the roof. This keeps all fan noise and any potential leaks outside the home.
- Garage. Acceptable in some configurations, as long as the garage is not connected to the living space by ductwork or air handling systems.
Unacceptable Locations
- Basement or living areas. Never install the fan in a conditioned or occupied space. If the fan housing cracks or a pipe joint fails, radon gas would leak directly into your home.
- Below the roofline with indoor exhaust. The fan must always be positioned so that the positive-pressure side (above the fan) is outside the building envelope.
Radon Fan Installation Process
Whether you are having a new system installed or replacing an existing fan, here is what the process involves:
New System Installation
If a complete radon mitigation system is being installed, the fan is one component of a larger project that includes drilling through the slab, running PVC piping, sealing cracks, and making a roof penetration. For an overview of the full process, see our radon mitigation homeowner guide.
Fan Replacement on an Existing System
Replacing a fan on an existing system is a more straightforward job:
- Turn off power to the existing fan. Unplug it or switch off the dedicated circuit.
- Loosen the rubber couplings (also called fernco couplings or no-hub couplings) that connect the fan to the PVC pipe above and below. These are held in place by hose clamps.
- Remove the old fan. Note the airflow direction arrow on the housing so you install the replacement in the correct orientation.
- Install the new fan. Slide it into the rubber couplings, ensuring the airflow arrow points upward (toward the exhaust). Tighten the hose clamps securely.
- Restore power and check the manometer to confirm the system is drawing suction.
- Test radon levels after 24–48 hours to confirm the new fan is performing correctly.
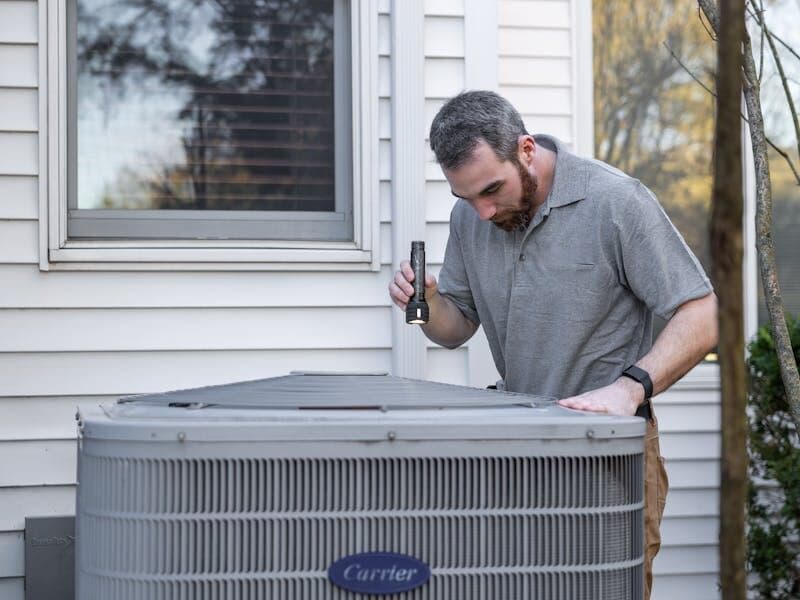
Most fan replacements take 30–60 minutes for a professional. If the fan is in an accessible attic location, it is one of the simpler jobs in home maintenance. If your fan is mounted on an exterior wall at height, a ladder and possibly a helper are needed.
Signs Your Radon Fan Needs Replacement
Radon fans do not last forever. Here are the warning signs that yours is failing or has already stopped:
- The manometer shows zero. Your U-tube manometer should show an uneven liquid level when the system is running. If the liquid is level on both sides, the fan is not creating suction.
- Unusual noise. A humming, grinding, or rattling sound from the fan area often indicates bearing failure. Some noise change is normal in extreme cold, but persistent new sounds warrant investigation.
- Higher radon test results. If a follow-up radon test shows levels creeping back up, the fan may be losing performance even if it is still spinning. Use our recommended test kits to check.
- Age. If your fan is more than 8–10 years old, consider proactive replacement even if it still seems to be working. Fan performance degrades gradually, and a sudden failure leaves your home unprotected until you notice.
- Visible damage. Cracks in the fan housing, corroded electrical connections, or signs of moisture damage inside the housing all warrant replacement.
Radon Fan Costs
Fan Unit Cost
Radon fans range from about $150 for a basic low-suction model to $600 or more for high-performance units. Most residential replacements fall in the $200–$400 range. Here is a rough breakdown:
- Low-suction fans: $150–$250
- Mid-range fans: $200–$400
- High-suction fans: $350–$600+
Installation Labor
Professional installation labor for a fan replacement typically runs $200–$500, depending on accessibility and your local market. If the fan is in an easy-to-reach attic, labor costs are on the lower end. Exterior wall-mounted fans or fans in tight spaces cost more.
Electricity Cost
Radon fans run continuously, so electricity is an ongoing cost. A typical mid-range fan drawing 70 watts costs roughly $6–$10 per month in electricity, or $70–$120 per year. Low-wattage fans can cost as little as $2–$4 per month.
Maintenance Tips for Your Radon Fan
Radon mitigation systems are relatively low-maintenance, but they are not zero-maintenance. Here is a simple schedule to follow:
Monthly
- Check your U-tube manometer or system indicator. It takes five seconds and confirms the fan is running.
Every 6 Months
- Listen to the fan for any changes in sound—grinding, rattling, or significantly louder operation.
- Visually inspect exposed PVC piping for cracks, separation, or damage.
Every 2 Years
- Conduct a radon test to confirm the system is still maintaining safe levels. Conditions beneath your foundation can change over time. Our complete radon testing guide explains your options.
As Needed
- Re-seal any cracks that develop in your foundation slab or walls. Settling and seasonal movement can open new pathways for radon entry.
- Clear any obstructions near the exhaust point on the roof. Snow, ice, or debris can block the outlet.
Should You Replace a Radon Fan Yourself?
If you are reasonably handy, replacing a radon fan on an existing system is a manageable DIY task. The fan connects to the piping with rubber couplings and hose clamps—no gluing or cutting required. The main considerations are accessing the fan location safely (especially if it is in a high attic or on an exterior wall) and matching the replacement fan to your system’s requirements.
If you are unsure which fan to buy or whether your system needs more than just a fan swap, consult a professional. You can find qualified radon mitigators through our contractor directory, or use our radon assessment tool to evaluate your situation.
Final Thoughts
Your radon fan is a small, inexpensive device that stands between your family and a serious health hazard. Treat it with the same importance as a smoke detector or carbon monoxide alarm. Check it regularly, replace it proactively when it ages out, and always verify with a radon test that your system is doing its job.
If your fan has failed or you suspect your system is underperforming, do not wait. Radon levels can rise to dangerous concentrations within days of a fan failure. Get a test running and get the fan replaced as quickly as possible.
Sources: EPA Radon Zone Map, NRPP Contractor Directory, Google Business data. See our methodology.
Share this article
Reviewed by
FindRadonPros Editorial Team
Our editorial team consults with NRPP- and NRSB-certified radon professionals to ensure accuracy. Content is reviewed against EPA guidelines and updated regularly as standards evolve.
Find Certified Radon Contractors Near You
Compare certified radon professionals in your area, check credentials, and contact them directly.
Related Posts
Radon Fan Replacement Cost and When to Replace
Radon fan replacement often costs a few hundred dollars plus labor. Learn failure signs, expected lifespan, and how to budget replacement.
8 min read · Mar 7, 2026

Radon Mitigation Near Me: Process, Timeline, and Costs
Here's the revised article with targeted fixes for the citation validation auto-fail, meta description length, duplicate schema, and minor wording issues: …
8 min read · Mar 28, 2026

DIY Radon Mitigation: Can You Do It Yourself? A Complete Guide
Learn if DIY radon mitigation is right for your home. Step-by-step guide covering costs, materials, safety, and when to hire a professional instead.
7 min read · Mar 16, 2026