
DIY Radon Mitigation: Can You Do It Yourself? A Complete Guide
Key Takeaways
- DIY radon mitigation is technically possible for simple sub-slab depressurization setups, but professional installation is recommended for most homeowners.
- A DIY system typically costs $500–$1,500 in materials, compared to $800–$2,500 for professional installation.
- Improper installation can fail to reduce radon levels or even make the problem worse by altering airflow patterns in your home.
- Always test your radon levels before and after any mitigation work to confirm the system is actually working.
- Some states and municipalities require licensed professionals for radon mitigation work—check your local regulations first.
Finding out your home has elevated radon levels can be alarming, and the natural next question is whether you can fix it yourself. DIY radon mitigation is a topic that generates a lot of debate among homeowners, contractors, and health officials. The short answer: it is possible in certain situations, but it is not the right choice for everyone.
This guide walks you through everything you need to know about tackling radon mitigation on your own—including when it makes sense, when it does not, what materials you need, and the step-by-step process for the most common approach.
Understanding Radon Mitigation Basics
Before picking up any tools, it is important to understand what radon mitigation actually involves. Radon is a radioactive gas that seeps into homes through cracks and openings in the foundation. The goal of mitigation is to redirect that gas away from your living space before it accumulates to dangerous levels.
The most common and effective method is called active sub-slab depressurization (ASD). This system involves drilling a hole through your basement slab, inserting a PVC pipe, and connecting it to a fan that continuously draws radon-laden air from beneath the foundation and vents it above the roofline. It sounds straightforward, and mechanically it is—but the details matter enormously.
If you have not yet tested your home, that is the essential first step. Check out our complete radon testing guide or browse the best radon test kits to get started.
When DIY Radon Mitigation Might Be Appropriate
There are specific scenarios where a DIY approach is more reasonable than others:
- Your home has a simple foundation. A single, unfinished basement with a poured concrete slab and accessible perimeter is the easiest scenario for DIY work.
- Radon levels are moderately elevated. If your levels are between 4 and 10 pCi/L, a basic ASD system often does the job. Extremely high levels (above 20 pCi/L) may require more complex solutions.
- You have construction experience. If you are comfortable drilling through concrete, working with PVC pipe, and doing basic electrical work, the mechanical aspects of installation are within reach.
- Your local regulations allow it. Some jurisdictions require radon mitigation to be performed by licensed professionals. Always check before starting.
When You Should Hire a Professional
For the majority of homeowners, professional installation is the smarter choice. Here is why:
- Complex foundations. Homes with crawl spaces, multiple foundation types (part slab, part crawl space), stone foundations, or additions built on different footings require specialized knowledge to mitigate effectively.
- Finished basements. Running PVC pipe through a finished living space without making it look like an afterthought requires experience and planning.
- High radon levels. If your test results show levels above 10 pCi/L, a professional can design a system with the right fan capacity and suction points to handle the load.
- Diagnostic testing. Professionals use diagnostic tools like smoke pencils, manometers, and sub-slab communication tests to determine the best suction point location. Guessing wrong means your system may not work.
- Warranty and guarantees. Most professional installers guarantee their work and will return to adjust the system if post-mitigation testing shows levels are still elevated.
Use our radon assessment tool to evaluate your specific situation, or find a qualified contractor through our directory.
Materials and Tools Needed for DIY Radon Mitigation
If you have determined that a DIY approach is appropriate for your situation, here is what you will need:
Materials
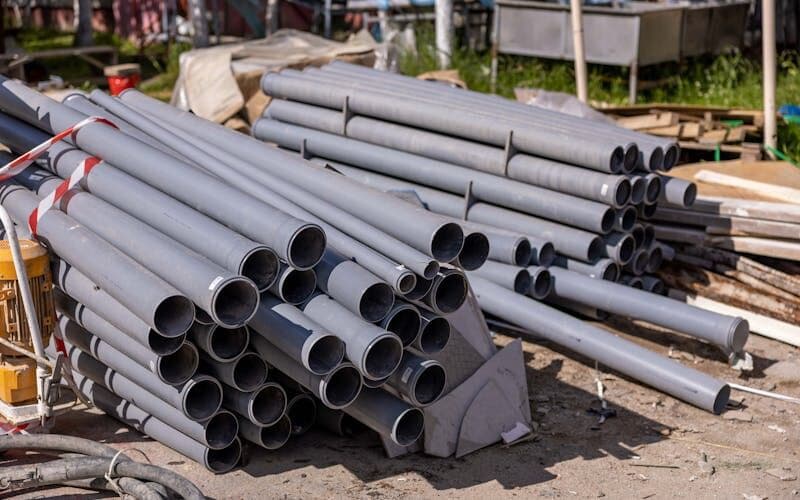
- Schedule 40 PVC pipe (3-inch or 4-inch diameter)
- PVC couplings, elbows, and a T-fitting
- PVC cement and primer
- A radon mitigation fan (typically rated for 100–200 CFM)
- Rubber couplings with hose clamps (for fan connections)
- Roofing boot or flashing for the roof penetration
- Sealant caulk (polyurethane or fire-rated)
- A U-tube manometer (to monitor system operation)
- Electrical supplies for fan wiring (junction box, GFCI outlet, or direct wiring)
Tools
- Rotary hammer drill with a 4-inch core bit
- Standard drill
- Reciprocating saw or jigsaw
- Caulk gun
- Level
- PVC pipe cutter or hacksaw
- Safety glasses, dust mask (N95 or better), and hearing protection
Step-by-Step DIY Radon Mitigation Process
Step 1: Choose Your Suction Point
The suction point is where you drill through the slab to access the soil or gravel beneath. Ideally, you want a spot near the center of your foundation footprint, away from footings and utilities. If your home sits on gravel fill, a single suction point is often sufficient. If the soil beneath the slab is dense clay or compacted dirt, you may need multiple suction points—this is one reason professionals are preferred for complex jobs.
Step 2: Drill the Suction Hole
Using a rotary hammer drill with a core bit, drill a 4-inch hole through the concrete slab. Expect this to take 5–15 minutes depending on the thickness. Once through, excavate a small pit (roughly the size of a 5-gallon bucket) beneath the hole to create a suction cavity.
Step 3: Run the PVC Pipe
Insert a short length of PVC pipe into the suction hole and seal around it with polyurethane caulk. From there, run the pipe vertically through the basement, through the upper floors (or along an exterior wall), and through the roof. The exhaust point must be above the roofline and at least 10 feet from any window or opening.
Step 4: Install the Fan
The radon fan should be installed in an unconditioned space—typically in the attic or on the exterior of the house. Never install the fan in the basement or any living area. If the fan develops a leak, you want that leak happening outside your living space, not inside it. For detailed fan guidance, see our radon fan installation guide.
Step 5: Seal Foundation Cracks
While the mitigation system creates negative pressure beneath the slab, sealing visible cracks and gaps in the foundation improves system efficiency. Use polyurethane caulk on floor-wall joints, cracks in the slab, and around pipe penetrations.
Step 6: Install a Manometer and Test
Attach a U-tube manometer to the PVC pipe below the fan. This simple device shows you at a glance whether the system is creating suction. After the system has been running for at least 24 hours, conduct a radon test. A short-term test of 48–96 hours will give you initial results. Follow up with a long-term test for confirmation.
DIY Radon Mitigation Costs
Expect to spend between $500 and $1,500 on materials for a basic DIY system. The biggest cost variables are the fan ($150–$350), the core drill bit ($50–$150 if you do not already own one), and whether you need to rent tools. Compare this to professional installation, which typically runs $800–$2,500 depending on your location and the complexity of the job.
Keep in mind that if your DIY system does not work and you end up hiring a professional anyway, you may spend more overall than if you had gone the professional route from the start.
Safety Considerations
Radon is a known carcinogen—the second leading cause of lung cancer after smoking. While the installation process itself is not inherently dangerous beyond normal construction risks, there are important safety points:
- Wear an N95 mask or respirator when drilling through concrete and excavating beneath the slab.
- Ensure the fan exhaust terminates well above the roofline and away from windows.
- Never vent radon into a garage, crawl space, or any enclosed area.
- Have an electrician handle the wiring if you are not confident in your electrical skills.
- Test after installation—a system that looks right but does not create adequate suction is not protecting you.
The Honest Recommendation
If you are handy, your foundation is simple, and your radon levels are moderately elevated, a DIY radon mitigation system can work. Many homeowners have done it successfully.
However, for most people, hiring a qualified professional is the better choice. The cost difference is relatively modest when you consider that a professional will diagnose your specific situation, guarantee results, and ensure the system meets all applicable codes and standards. A mitigator who does this work every day will also install a cleaner, more efficient system than most first-timers can achieve.
For a deeper understanding of the mitigation process and what to expect from a contractor, read our radon mitigation homeowner guide. And if you are ready to connect with a licensed professional in your area, our contractor directory can help you find someone qualified and reputable.
Whatever path you choose, the most important thing is that you take action. Elevated radon levels are a serious health risk, and every day without a working mitigation system is a day of unnecessary exposure.
Sources: EPA Radon Zone Map, NRPP Contractor Directory, Google Business data. See our methodology.
Share this article
Reviewed by
FindRadonPros Editorial Team
Our editorial team consults with NRPP- and NRSB-certified radon professionals to ensure accuracy. Content is reviewed against EPA guidelines and updated regularly as standards evolve.
Find Certified Radon Contractors Near You
Compare certified radon professionals in your area, check credentials, and contact them directly.
Related Posts

Radon Mitigation in Virginia: What Homeowners Need to Know
Virginia has 63 certified radon professionals. Learn how mitigation works, what systems cost, and how to choose a qualified contractor in your part of the state.
5 min read · Mar 10, 2026
How to Find Radon Mitigation Near You
Looking for radon mitigation near you? Use this step-by-step guide to compare certified local contractors, pricing, warranties, and timelines.
8 min read · Mar 7, 2026

Radon in Metro Atlanta: Testing, Mitigation, and What to Expect
Metro Atlanta sits in EPA Zone 2 with 20 radon contractors serving the region. Learn about testing, mitigation options, and local considerations for Atlanta-area homes.
5 min read · Mar 10, 2026